

Your First 15 Minutes with 365sentri: How to Baseline a Microsoft 365 Tenant
Every MSP has inherited a Microsoft 365 tenant shaped by years of change.
Different administrators and providers have made different decisions. Conditional Access policies may overlap or conflict. MFA coverage can vary from one user to the next. Guest access may be broader than expected, and old enterprise applications can remain long after their owners have moved on.
Before you recommend changes, you need a reliable baseline: what is configured, where it differs from your standard and which gaps deserve attention first.
This guide shows you how to connect a tenant to 365sentri, run an initial assessment and produce your first report. The initial setup typically takes around 10–15 minutes, although synchronization can take longer for large or complex tenants.
Before you begin
Make sure you have the tenant owner’s approval to perform the assessment and an account authorised to grant the required Microsoft permissions.
Connecting and assessing a tenant is not the same as receiving approval to make changes.
Step 1: Register and Connect
Click here 365sentri.com free trial and register for a free trial.
Once you are in, you will select your region, and the first thing you will do is allow the Enterprise Application.
This is the secure bridge between 365sentri and your Microsoft 365 environment.
It uses standard Microsoft permissions, so you will see exactly what you are connecting and why.
Step 2: Import your tenant
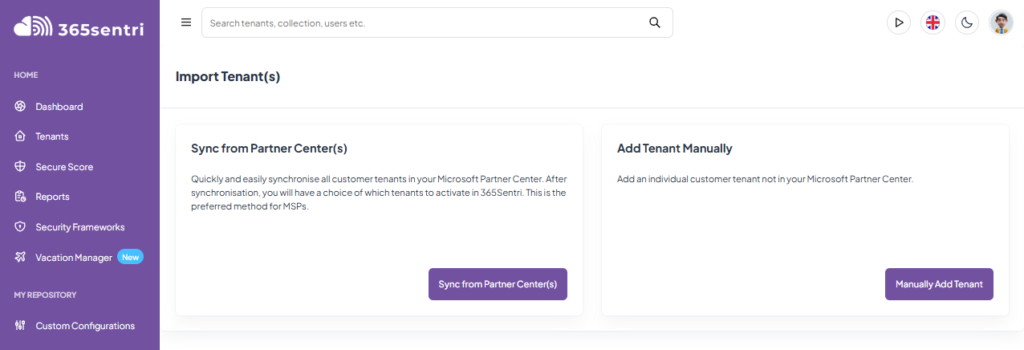
Open Tenants, then select Import Tenants.
You can add tenants in one of two ways.
Option A: Synchronize from Microsoft Partner Center
If you are a Microsoft Cloud Solution Provider, this is usually the quickest option. 365sentri imports the tenants available through your Partner Center relationship, reducing manual data entry and helping you establish your fleet view.
Option B: Add a tenant manually
Use Manual Add when:
-
- You are not a CSP partner.
-
- The tenant is not included in your Partner Center relationship.
-
- You are assessing a tenant individually.
Enter one verified domain associated with the tenant to get started.
Step 3: Find or Save the Tenant
After you choose Sync from Partner Center or Manually Add Tenant, depending on your relationship with the customer.
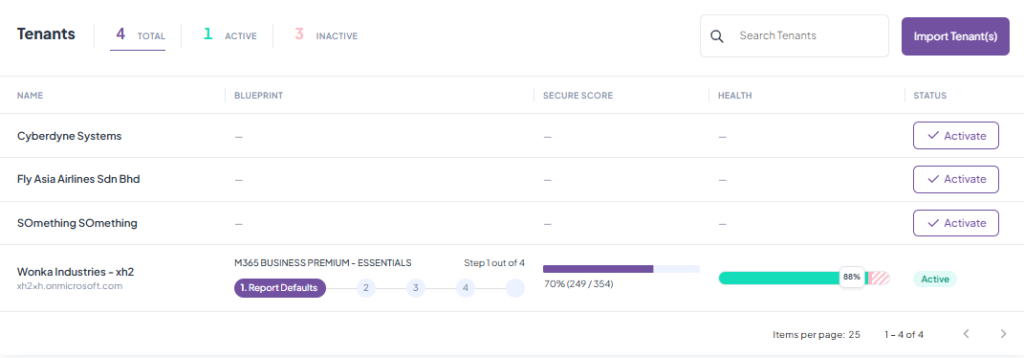
Ensure you click TOTAL so you can see all Tenants available
or
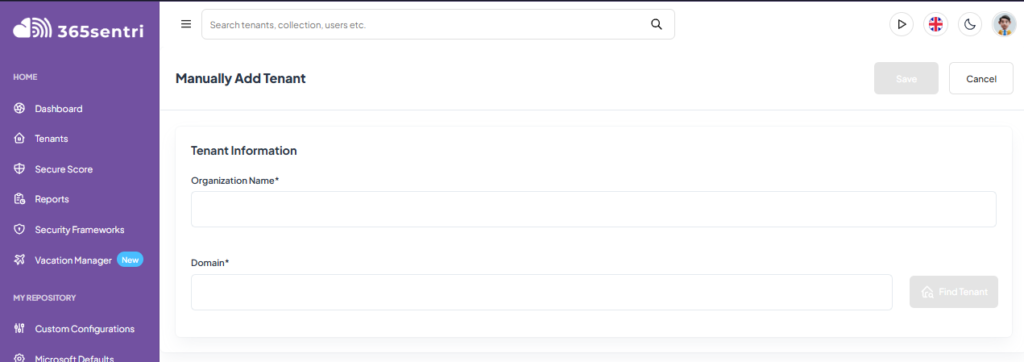
Click Find Tenant, then Save and it will appear in the Tenants tab
Step 4: Activate
Select Activate for the tenant you want to assess and potentially baseline
Sign in with an account authorised to complete the required Microsoft consent process.
This will require a Global Administrator or another appropriately privileged role.
Activation establishes the connection needed for 365sentri to inspect the tenant’s configuration.
It also allows the platform to identify and obtain Tenant-specific data that needs to be captured before it can be evaluated accurately.
Once activation is complete, allow the tenant to synchronize.
This may take a few minutes, but larger environments with more users, mailboxes and configuration data may take longer.
Do not close the process before the connection and permission checks have completed.
Step 5: Add & Apply Your First Blueprint
This is where it gets interesting.
A blueprint in 365sentri is a predefined set of security and configuration standards that you want to enforce across a tenant.
Think of it as your baseline. The platform compares the current tenant state against the blueprint and tells you exactly where the gaps are and tells you how healthy your alignment is to it.
If you are new to this, start with the M365 Business Premium – Essentials blueprint. It contains approximately 42 starter configurations. Thirty-four of those are evaluated in step 1 of the deployment plan.
If you have your own standard you want to deploy, or you are now comfortable with the Business Premium – Essentials blueprint and want to do more, get in touch with us for a detailed Blueprint Building Session where we can discuss your specific requirements
To add it:
Open Deployment Plans in the Global Menu (Purple)
Select Ready to Go Plans.
Add M365 Business Premium – Essentials.
Return to the tenant.
Select Add Blueprint.
Choose the Business Premium – Essentials Blueplint.
Select Save and Deploy.
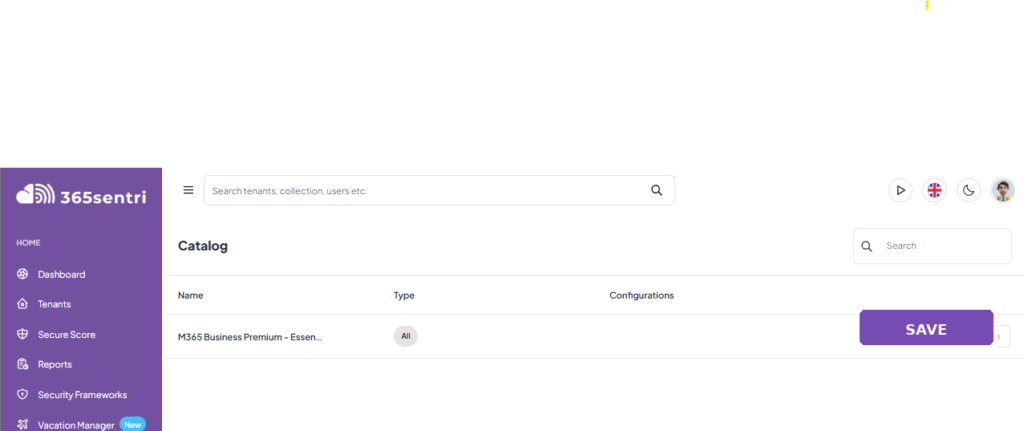
Then navigate back to your tenant, click Add Blueprint, select the Business Premium – Essentials plan, and click Save and Deploy.
Then navigate to your Tenant – and click “Deployment Plan”
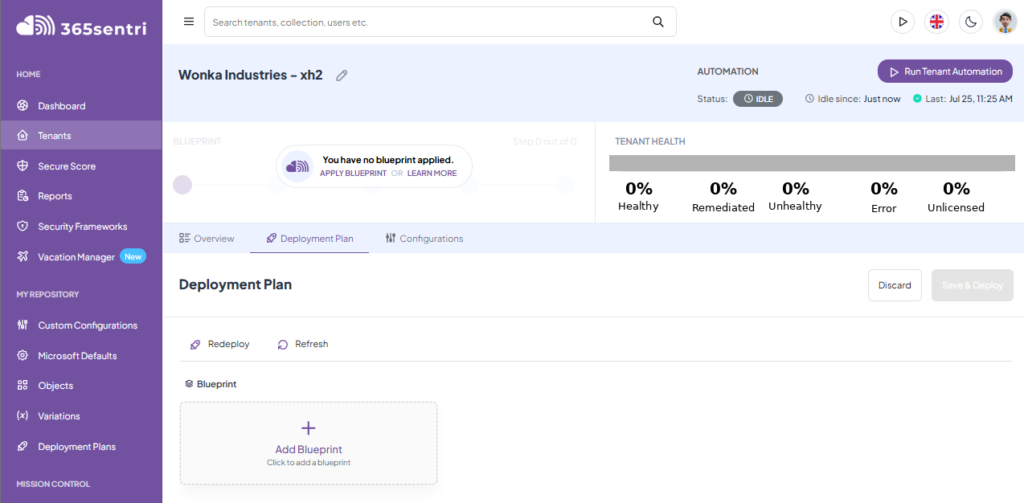
Then you have applied Stage 1 – Report Defaults
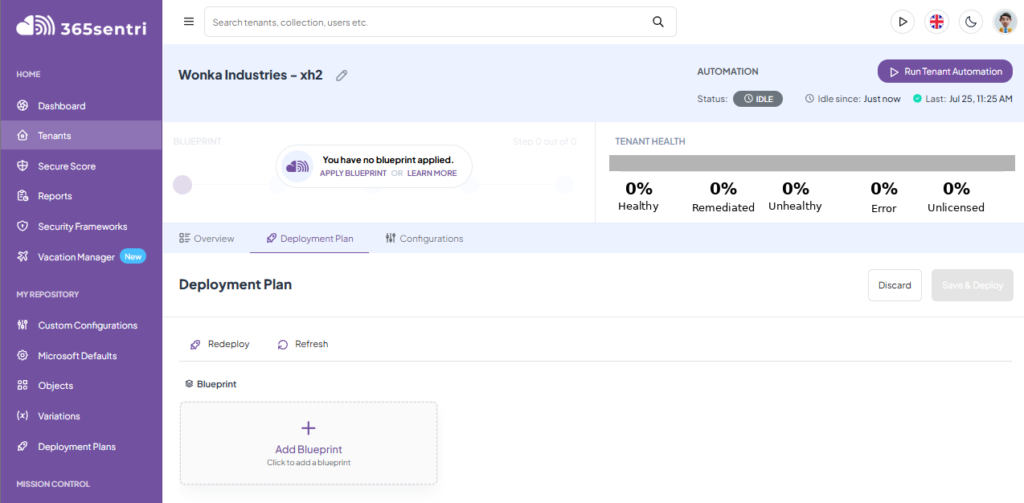
The starter blueprint is a practical first baseline, but it does not need to be your final standard.
As you become more familiar with the platform, you can build a blueprint around your own service model, licensing, customer risk profile and operational requirements.
Step 6: Run the Automation and See Your Score
Once you have clicked Save and Deploy. The platform will scan the tenant against all configurations in the current stage of your blueprint. This may take a few minutes.
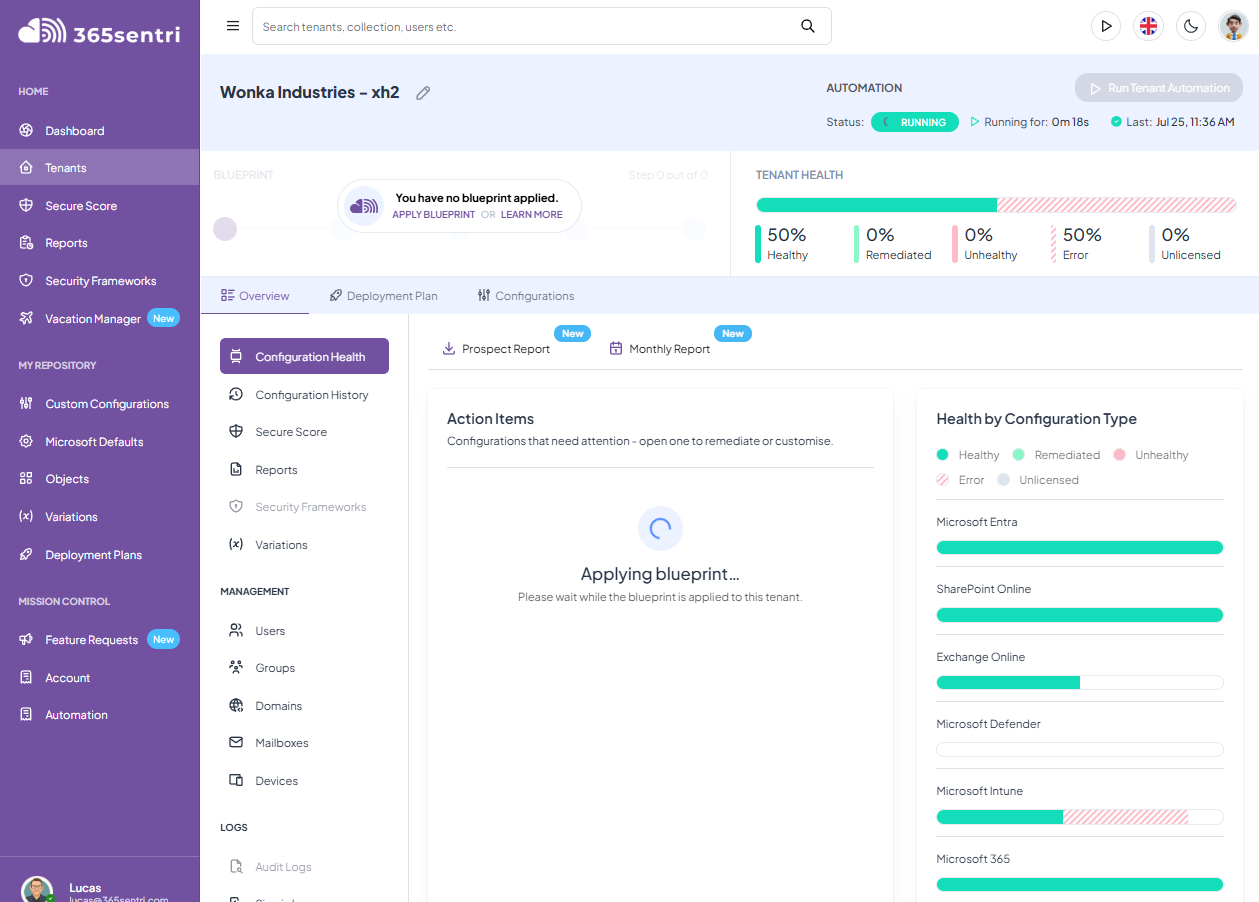
If you navigate to the Tenant screen, it will look like this
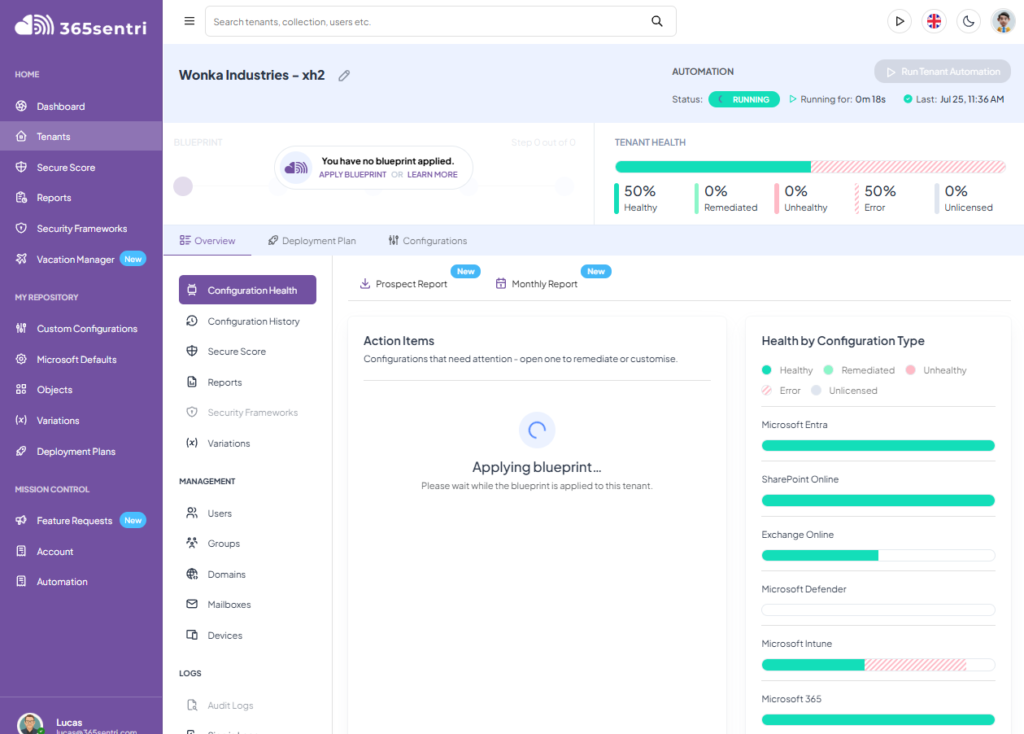
Once it finishes, refresh your tenants page. You will see a Tenant Health score.
Do not be alarmed if the first score is low.
Based on our experience, many tenants initially land between 20% and 40% against the starter blueprint.
That result is not automatically evidence of poor management by a previous provider. Microsoft 365 is a broad platform with configuration choices that must accommodate many different organisations.
Security requirements also evolve over time, while tenants accumulate exceptions, legacy settings and licensing changes.
The initial score is a starting point only – not a verdict as to how things were managed.
Its purpose is to make the current state visible and measurable.
Step 7: Understand the Gap
Open the tenant overview to see Tenant Health broken down by service, including:
-
- Microsoft Entra
-
- SharePoint Online
-
- Exchange Online
-
- Microsoft Defender
-
- Microsoft Intune
-
- Microsoft 365
Each category has a progress indicator:
-
- Green: The configuration matches the blueprint.
-
- Salmon: The configuration does not match the blueprint.
-
- Striped or error: The item could not be evaluated successfully. This may indicate a licensing limitation, missing data, insufficient permission or a configuration issue in Microsoft 365.
Next, scroll to Action Items. This is the working list of differences between the blueprint and the live tenant.
Each action item includes:
-
- The Microsoft service and configuration area
-
- An importance level
-
- The expected configuration
-
- The tenant’s actual configuration
-
- A remediation option, where supported
Open an item to compare Expected with Actual side by side.
This comparison gives you a much clearer client conversation than a generic statement about best practice. It shows the standard you selected, the tenant’s current state and the specific difference between them.
Assess first. Remediate later.
If you are assessing a prospect or a newly onboarded customer, do not select Click to Remediate unless the customer has explicitly authorised the change. Remediation alters the live tenant and should follow your normal approval, testing, maintenance-window and rollback procedures.
Step 8: Review the Reports
Before changing anything, open Reports. Tenant-specific reports provide additional context for your technical review and customer conversations.
The Authentication Methods reports are particularly useful during an initial review. They can identify:
-
- Administrators using SMS or voice authentication
-
- Administrators without phishing-resistant MFA
-
- Administrators without passwordless authentication
-
- Administrators without self-service password reset
-
- Equivalent authentication gaps across the wider user population
A large number of users without phishing-resistant MFA is not unusual. The important outcome is that you now have a measurable population, a documented risk and a basis for planning improvements.
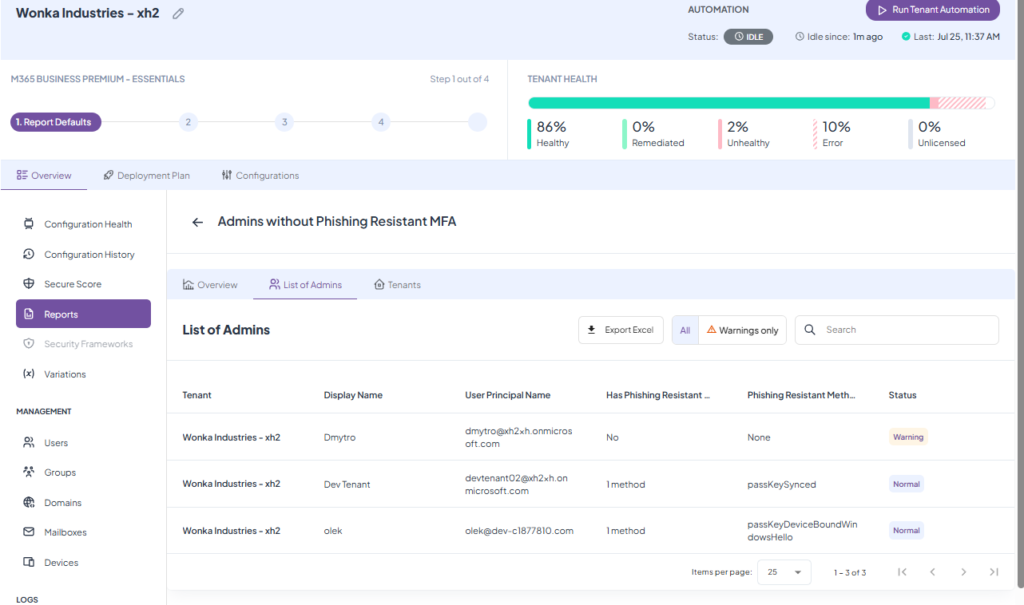
Review the Enterprise Applications reports as well. They can help surface applications that were created years ago, have unclear ownership or may no longer be required.
Treat report findings as investigation prompts. Confirm business ownership, licensing and operational dependencies before recommending removal or configuration changes.
Step 9: Generate Your First Prospect Report
Now that you have the full picture, document it. Generate a Prospect Report from the overview page.
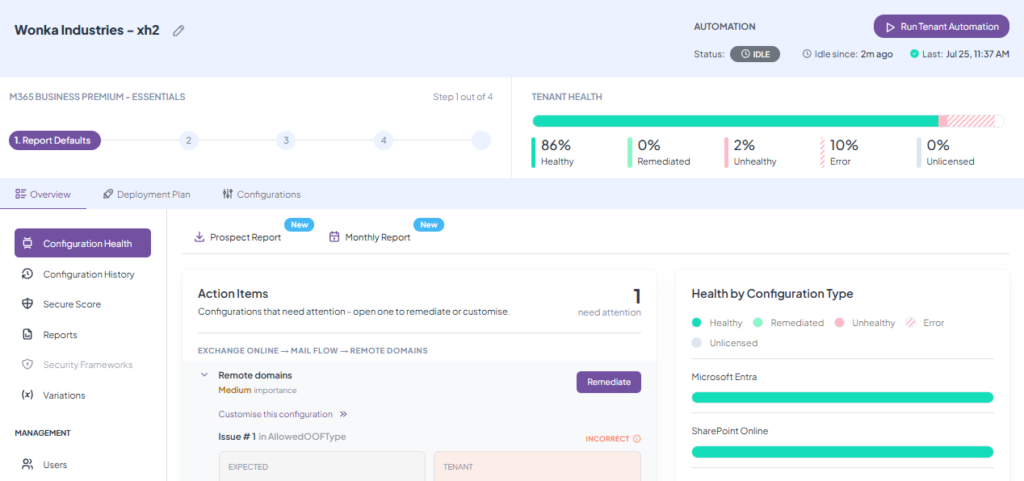
The Prospect Report is your sales and onboarding document. It shows the client where they started, what you found, and what the gaps are. It shows you the security score, which is important for Cyber Insurance.
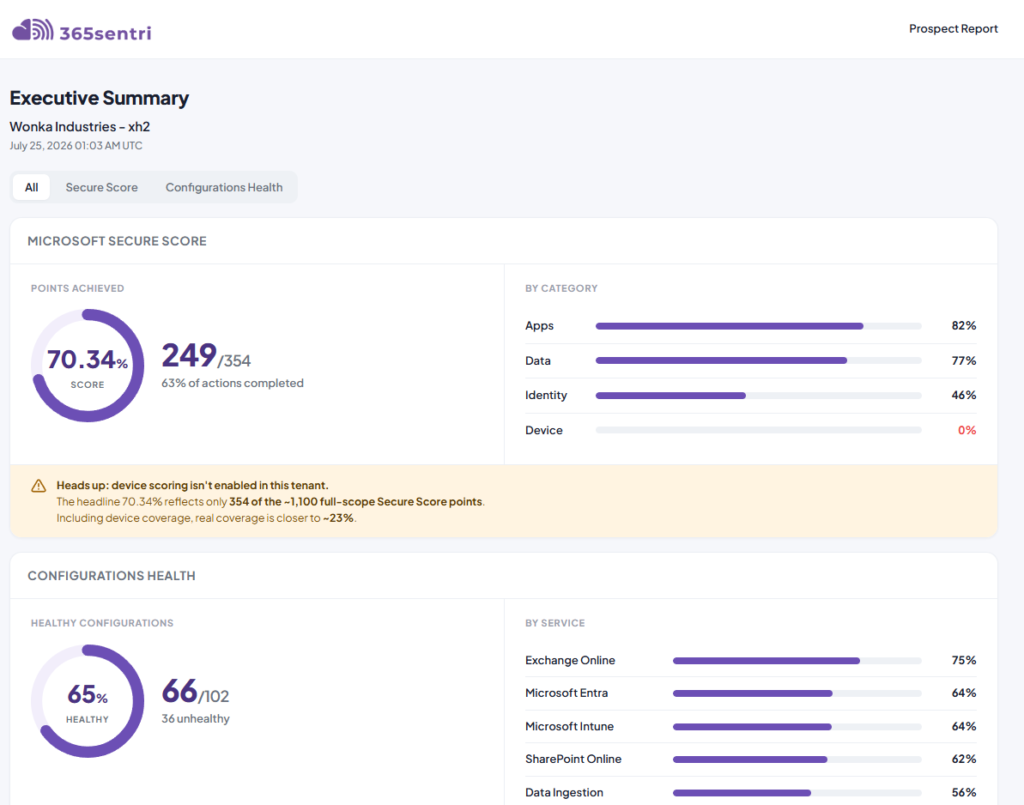
It turns a technical audit into a business narrative. This is the report you bring to your first client review. It establishes the baseline and justifies the remediation work that follows. It is also in HTML, so it is lightweight, easy to use, and straightforward to ingest into any tool you are using
The Monthly Report is your ongoing retention tool. Run it before every QBR – you can adjust the dates. It shows progress, trend lines, and proof that you are actively managing the environment.
The report can support broader risk and cyber-insurance discussions, but it should not be presented as an insurance assessment or guarantee of compliance. It is evidence of the tenant’s configuration against the selected blueprint at a point in time.
Step 10: Remediate when you are ready
With the baseline documented and the customer aligned on the plan, return to Action Items and begin remediation.
For supported configurations, 365sentri can apply the change directly. For other items, it provides the relevant PowerShell guidance or Microsoft portal path so your team can complete the work manually.
Prioritise actions according to risk, business context and change impact
An importance label is the beginning of the decision, not the whole decision.
Before changing a live tenant, consider user impact, licensing, technical dependencies, compensating controls and rollback requirements.
Watch for unexpected side effects, such as breaking SMTP flows or forcing MFA on users who are not prepared
You now have a documented starting point
In one onboarding workflow, you have moved from limited visibility to:
-
- A connected Microsoft 365 tenant
-
- A defined configuration blueprint
-
- A measurable Tenant Health baseline
-
- A prioritised list of configuration gaps
-
- A report you can review with the customer
That baseline helps turn tenant management into a repeatable service. You can show where the customer started, agree on the desired standard and demonstrate improvement over time.
The final goal of the Blueprint is to advance through all stages so that the entire security configuration plan is deployed.
This walkthrough shows you how to run reports and assess a Tenant.
To advance through the blueprint, you merely need to follow the walkthrough guidance in the Configuration Health Centre and ensure there are no Action Items pending remediation.
As your confidence grows, refine and adjust the blueprint to reflect your own security standards and customer requirements.
The goal is not simply to increase a score.
The goal is to establish a consistent, explainable and maintainable configuration posture across the Tenants you manage – and that consistency is your pathway to security.
Ready to establish your first baseline? Start a free trial or book a blueprint session with the 365sentri team .