Use this procedure to activate a tenant in 365sentri. After you activate the tenant, you can manage it in 365sentri.
Before you start
Make sure that you have these items:
- The tenant shows in the Tenants view.
- Global Administrator credentials for the Microsoft 365 tenant of the client.
- Access to the multi-factor authentication (MFA) method for that account.
- A payment method, if the trial for this tenant has expired and you have not added a payment method before.
- A Blueprint in Deployment Plans. You apply it in the Deployment Plan stage of the wizard.
- Optional: A list of the Emergency Access (break-glass) accounts and the Wi-Fi SSID. You need these only if you make a variation, but have them ready now.
About the activation wizard
The activation wizard has seven stages. The wizard shows the stages in this sequence:
- Select Billing Frequency
- Payment Method
- Activation
- Integration
- Data Sync
- Variations
- Deployment Plan
This page has one section for each stage. The step numbers in each section start at 1. They are not the stage numbers of the wizard.
Open the activation wizard
- In 365sentri, open the Tenants view.
- Find the tenant that you want to activate.
- Click Activate next to the tenant. The activation wizard opens.
Note If the tenant does not show in the list, click Import. Then synchronize Partner Center again or add the tenant manually.
Stage 1 of 7
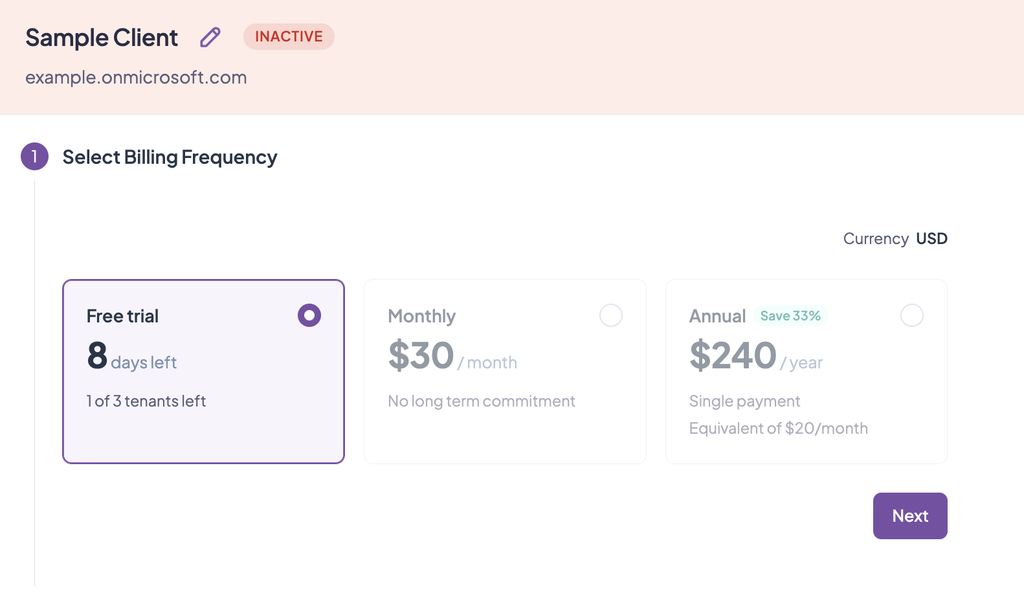
Select billing frequency
- Examine the plan and the activation price. A trial tenant does not show a price.
- Select the billing frequency.
- Click Next.
Stage 2 of 7
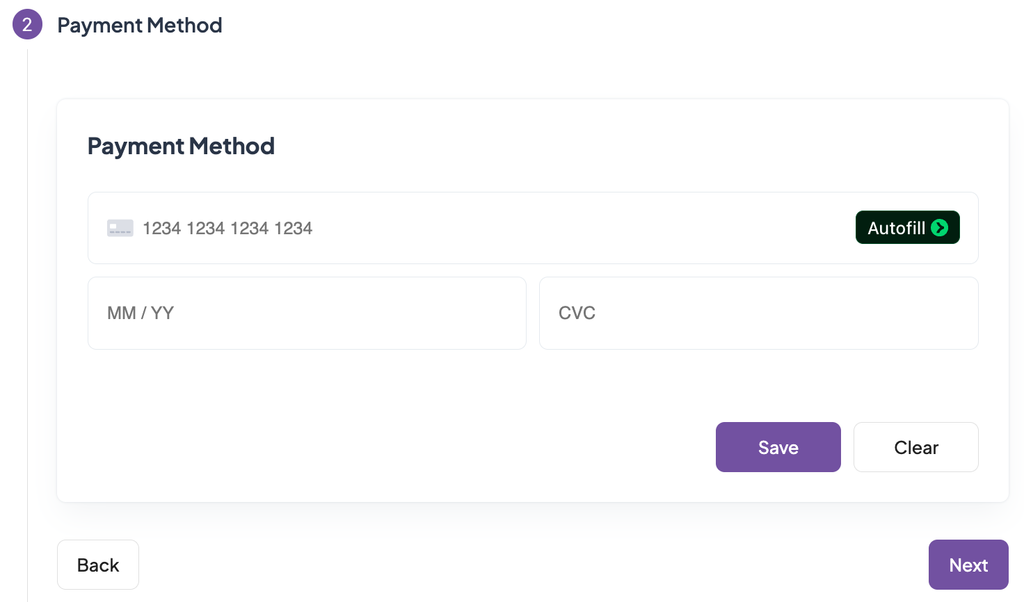
Payment method
Note During the trial period, or a payment method is already saved, this stage is automatically skipped.
Adding a payment method during the trial period is not required.
- If the trial has expired and no payment method is on file, add a payment method.
- Click Next.
Stage 3 of 7
Activation
In this stage, you give 365sentri consent to manage the Microsoft 365 tenant of the client.
Click Copy Link, this will copy the activation URL to your clipboard.
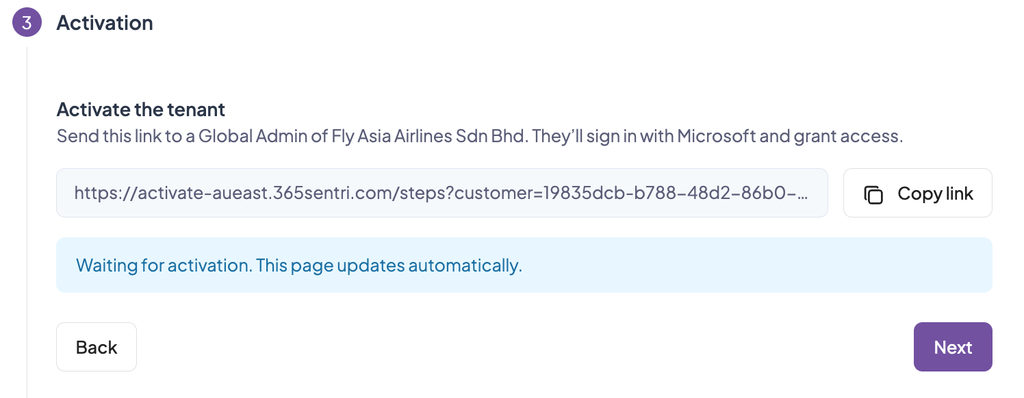
Note Do not close this 365sentri window. We will return to it to continue the activation.
If the window is closed, activation will still complete successfully but the following steps will need to be completed outside the wizard.
Open a new private browser window (Incognito in Chrome, InPrivate in Edge).
Note A private window prevents a sign-in with the wrong Microsoft 365 account.
Paste the activation URL into the address bar and press Enter.
Click Sign in.
screenshot · Login to Authorise page
Type the user name of a Global Administrator account from the Microsoft 365 tenant of the client. Click Next.
screenshot · Microsoft sign-in
Type the password and do the MFA prompt.
Examine the permissions that 365sentri requests. Click Accept.
screenshot · Permissions requested
Second Sign In and Authentication Sometimes you will need to sign in and authorise the application a second time.
Simple select the already logged in Global Administrator account, and Grant Consent a second time to the 365sentri – Tenant Automation Enterprise Application.
Close the private browser window.
Go back to the 365sentri window.
screenshot · Activation stage complete
Stage 4 of 7
Integration
Steps for the Integration stage are still to be confirmed.
screenshot · Integration
Stage 5 of 7
Data sync
Steps for the Data Sync stage are still to be confirmed.
screenshot · Data Sync
Stage 6 of 7
Variations
- Add the variations that are necessary for this client. For example, the Emergency Access (break-glass) accounts and the Wi-Fi SSID.
- Click Next.
Note If this client does not need variations, click Next.
screenshot · Variations
Stage 7 of 7
Deployment plan
- Select the Blueprint that you want to apply to this tenant.
- Click Finish.
screenshot · Deployment Plan
Result
The tenant shows in the Tenants view. You can now manage the tenant in 365sentri.
screenshot · Tenants view